Top 3 Method to Import PST to Mailbox
dheeraj | September 11th, 2021 | Exchange Server, PST Outlook
Here in this article we covered up entire process method Import PST to Mailbox using Outlook and PowerShell process. The recommended solutions using manual tips and the software program enable users to migrate PST emails and content to Mailbox directly.
PST files are not unfamiliar to IT administrators, as they have existed for years. However, if you are unfamiliar with Exchange or PST files, what are they? It is a personal storage table that is associated with Microsoft Outlook. It enables you to construct folder structures and drag-and-drop messages from your mailbox to the PST file. Many people use PST files as backups, and when they grow too large, they corrupt or you are unable to enter Outlook due to PST file issues. With many businesses migrating their email servers from on-premises to the cloud, PST files can be consumed and removed from users’ PCs. Mimecast, for example, will offer you an encrypted disc on which you may copy all of your company’s PST files. They will then import that mail into your archive, ensuring that it is always accessible. The same is true if you have a separate Exchange Server store for archive mailboxes — they can be imported there or users can import the PST file directly into the archive mailbox that will be accessible in Outlook. We’ll look at two techniques for importing PST files: 1) using the Exchange Management Shell (EMS) or the Exchange admin center, and 2) using Outlook. (Note that to enable archiving in Exchange, the user must have an Enterprise client access license (CAL).)
Import PST Files with PowerShell

For both of the above-mentioned methods of importing PST files, we must build a shared folder with permissions such that the Exchange Trusted Subsystem may access the contents without trouble. It might be a file server in your environment, or if you simply have a few PST files, you could create it on your Exchange Server. Alternatively, if you have a dedicated mail server that is used just for mail flow, you can establish a folder called PST or PSTFiles that you must share. Then, under advanced sharing, enable full access to the Exchange Trusted Subsystem.
Once it is complete, you may copy over the PST files from users’ workstations, which are easily identifiable because they will most likely have the email address as the PST name. After the copy is complete, you must decide where to import the PST files. This may include the following destinations:
- The mailbox folder to which you want to send the message.
- To the archive email address.
- To the user’s primary email address.
Prior to performing PST file imports, you must confirm that you have the appropriate rights in Exchange. By default, there are no associated role groups to the mailbox import-export role. Once this is completed and the environment’s replication is complete, you can proceed with the pst to mailbox imports.
The preceding command is quite straightforward. It imports the PST file from the server EX2016A and saves it to the “PSTImport” destination folder.
The following command will import the PST file into the users’ archive mailbox:.

You can perform the last option as a straightforward import without specifying any target directories; simply use the same command as option one but omit the -TargetRootFolder parameter.
Exchange Administration Center & EMS service
You can do imports via the Exchange admin center’s graphical user interface. To begin, open Exchange admin center and click mailboxes on the Recipients Tab on the left. Click the three dots (…) next to the refresh button, and then on “Import PST.” The “Import from a.pst file” wizard will start, and you will be prompted to specify the location, which in this case will be EX2016APSTFilesUser1.pst.
After clicking Next, you can select the mailbox to import to from the subsequent dialogue. You have the following options:
- Import the contents of this mailbox.
- Import to the archive of this mailbox.
- Following that, proceed to the further pages and then click end.
You may use PowerShell to determine the status of imports for the top two alternatives, the EMS – Microsoft Exchange Management Shell and the Microsoft Exchange admin center. The following are few instances of how we can use the Exchange Management Shell.
The preceding command is quite straightforward. It imports the PST file from the server EX2016A and saves it to the “PSTImport” destination folder.
The following command will import the PST file into the users’ archive mailbox:.
You can perform the last option as a straightforward import without specifying any target directories; simply use the same command as option one but omit the -TargetRootFolder parameter.
Exchange administration center and enterprise management system.
You can do imports via the Exchange admin center’s graphical user interface. To begin, open Exchange admin center and click mailboxes on the Recipients Tab on the left. Click the three dots (…) next to the refresh button, and then on “Import PST.” The “Import from a.pst file” wizard will start, and you will be prompted to specify the location, which in this case will be EX2016APSTFilesUser1.pst.
After clicking Next, you can select the mailbox to import to from the subsequent dialogue. You have the following options:
Import the contents of this mailbox.
Import to the archive of this mailbox.
Following that, proceed to the further pages and then click end.
You may use PowerShell to determine the status of imports for the top two alternatives, the EMS – Microsoft Exchange Management Shell and the Microsoft Exchange admin center. The following are few instances of how we can use the Exchange Management Shell:

The aforementioned option will reveal all import requests for mailboxes. This covers imported mailboxes in a queued, failed, in progress, or finished condition.

The above program receives all import requests for the “MailboxDB1” database.
Bad Item Limit Issues
Just as with mailbox movements, if import requests are not imported, you can establish a problematic item limit. To do this, the following command can be executed. (The example below sets the User1 limit to 5:

Importing on Outlook All or Single PST files
It is quite easy to import PST files into Outlook, but Outlook does “hang,” thus if you intend to use this method, then urge your users to use OWA for mail or wait till the procedure is complete.
When clicking on the “File” menu and selecting the “Open & Export” option in Outlook you can then choose “Import/Export” to start the wizard. The predetermined choice is “Import from another program or file,” select it and click Next.
You will choose .PST on the next page, and you will be able to navigate the place where the PST file is located once you click Next and then you can allow or not import duplicates.
There are options for importing PST files. You can also import bulk from Exchange.
Also read about Import Contacts, Calendar, Emails from PST on Outlook
Import Multiple PST Directly into Mailbox Web Online
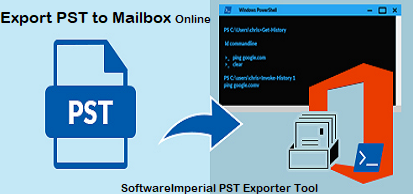
Use the MVPs suggested SoftwareImperial Outlook PST Converter Tool if you wish to import PST emails, calendars, contacts and entire labels and items to Mailbox account online in bulk. No additional knowledge and settings required, simply use the program. Within 5 steps for Outlook PST export to Mailbox.
You can easily add one or more PST files from your system or your tool’s domain network. It is then the complete duty of the migration tool. It requires no constant user supervision.
The tool also permits the second incremental migration of the same PST file. It also provides selective category and date filter transfer for PST file items. The program not only keeps the full metadata of e-mail, but also removes superfluous folders like Sending Articles and Deleted Articles. In general, this software is the ideal choice for consumers wishing to Migrate PST files to Mailbox account Exchange or Export PST to Outlook Web Access without any problems.
The following steps to import PST to Mailbox online Web:
- Download and start the import tool.
- Login to the tool with the admin account.
- To import PST files, use Add File/Folder option.
- Map the PST file and the Validate Mailbox Settings and account.
- Choose the item category to import from PST file and hit Start button.
Now, the program starts importing PST file into the Mailbox web interface and produces the report after the procedure is done.
Summary:
When importing PST to Mailbox online online, many Office 365 webmail customers suffer the same difficulty. Since the manual method requires best knowledge and skills hectic task of settings, this procedure is long and complex for most people. We have provided a straightforward procedure for users to import PST to Mailbox directly with authenticity online the Outlook 365 web application. Users can choose any of these ways according to their choice.